
There are many inexpensive joysticks that can be used for CNC control such as the Xbox controller, but I wanted something very customizable. I also wanted the control to be compact and streamlined. I didn’t want a Franken-panel. Here’s what I came up with…
This is my first project using my Romaxx HS-1 CNC router. I wanted an MPG for manual control. I looked in my junk drawer and came up with an LS-30 rotary joystick and a blue pushbutton (both circa 1986). I also found a green volcano button, a handful of surplus electronics and an aluminum project box. With these items I sketched the design below.
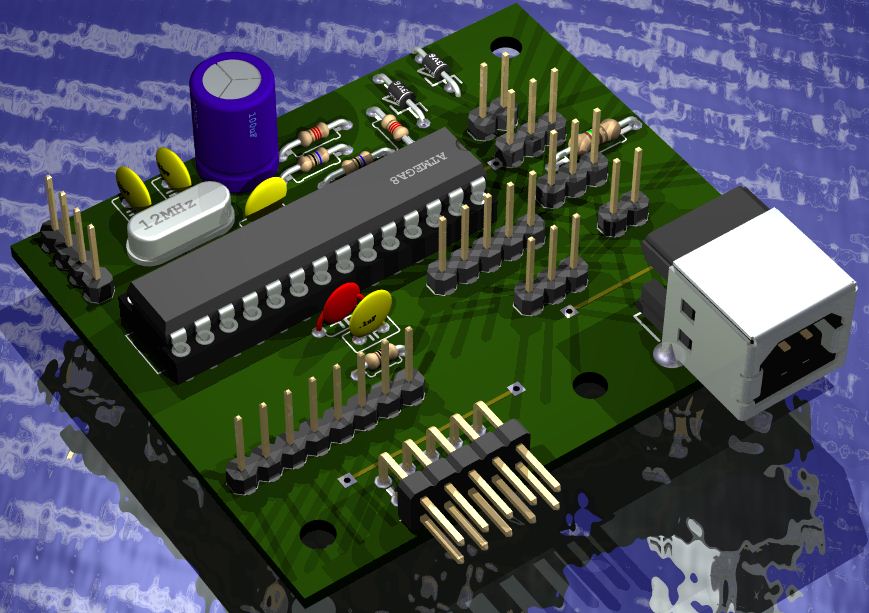
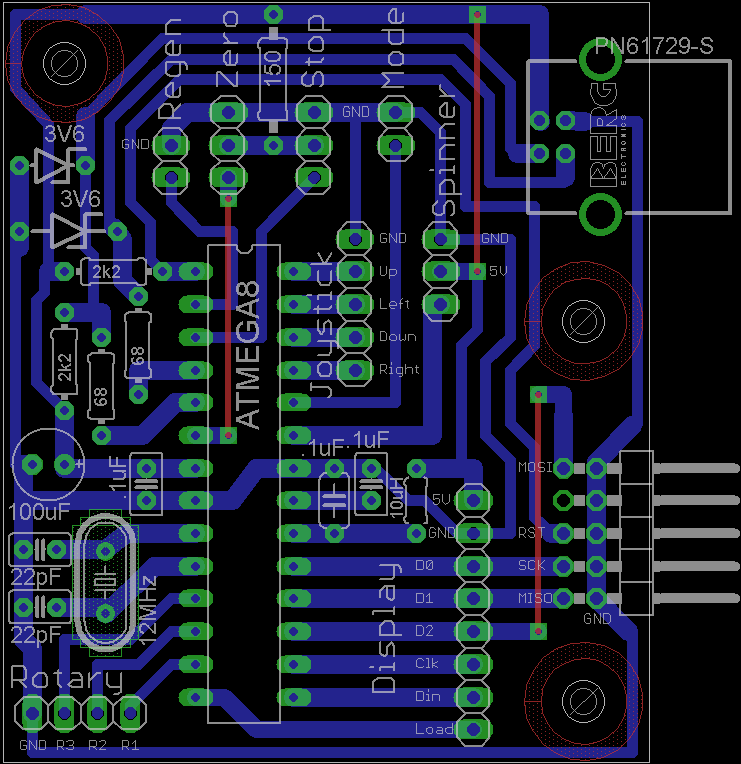
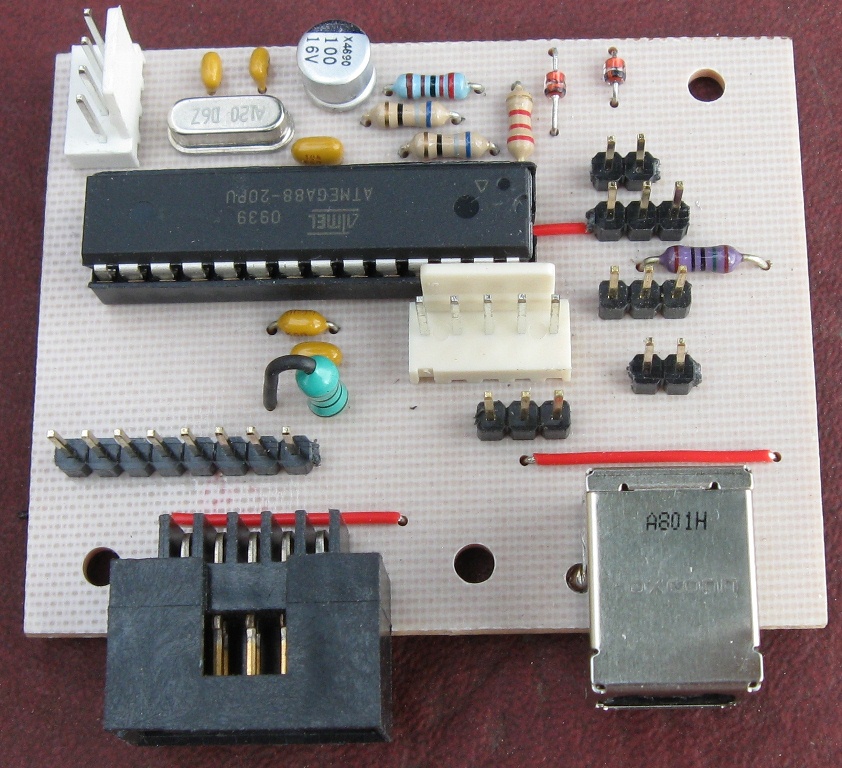
I used CadSoft Eagle to create the main board. I am using an Atmel ATMega88 to implement a firmware-only implementation of a USB HID joystick. The virtual USB software was developed by Ollopa. Here is 3D render and image of the board.
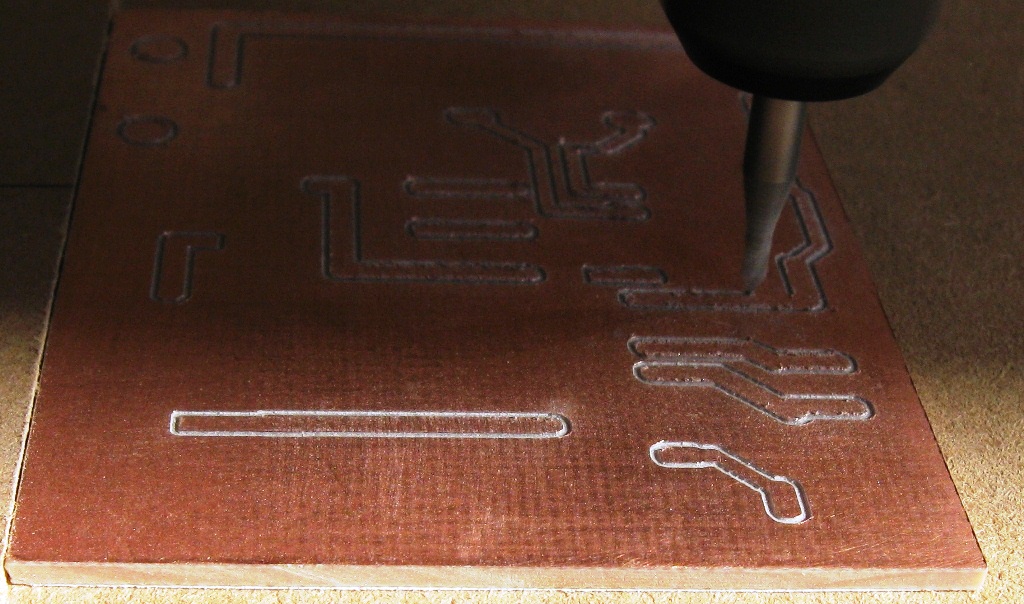
Here is the HS-1 cutting the isolation traces. I used PCB-GCode to convert the Eagle board into g-code for the CNC control software. The bit is a 60° mechanical etching bit (.0050″ tip). I leveled the MDF top and I’m using carpet tape to hold the PCB in place.
 |
PCB-GCode Settings Default: 0.007 Maximum: 0.005 Step Size: 0.002 Etching Tool Size: 0.007 Z Down: -0.0045 Feed Rates XY: 10 Feed Rates Z: 5 Tool Change Position Z: 0.5 |
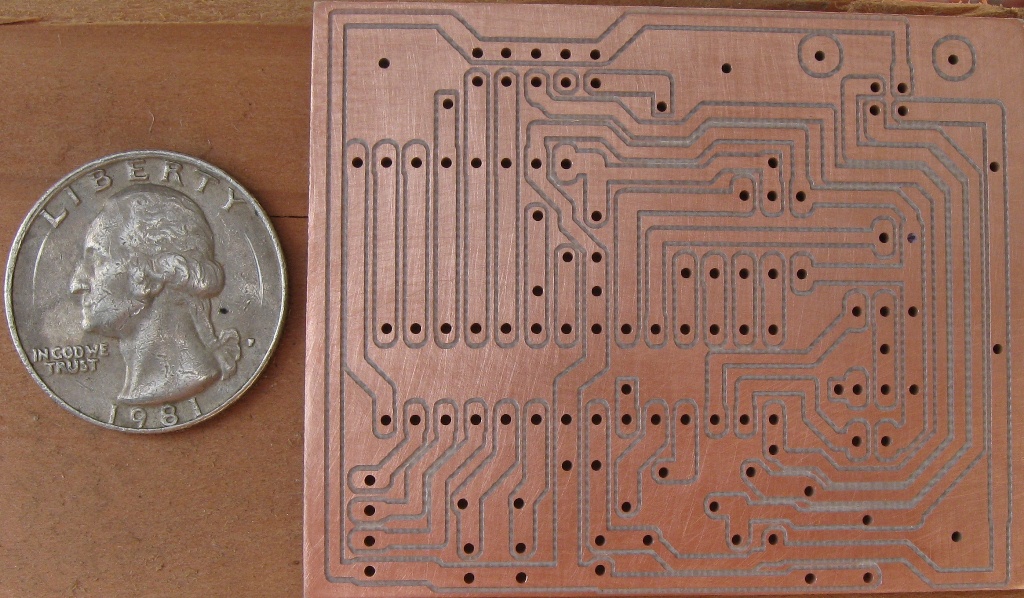
This was my first PCB project board milled on the HS-1. I purposely made the traces wide to allow for any mistakes. This required three bridges that otherwise I could have routed between pins. Since I’m using a v-bit, I was concerned about depth errors. Any change in the bit height affects the width of the isolations. I really should be using a floating spindle or a depth probe to compensate for thickness variations in the PCB. Nonetheless, the results are good. It’s great not having to manually drill all the holes.
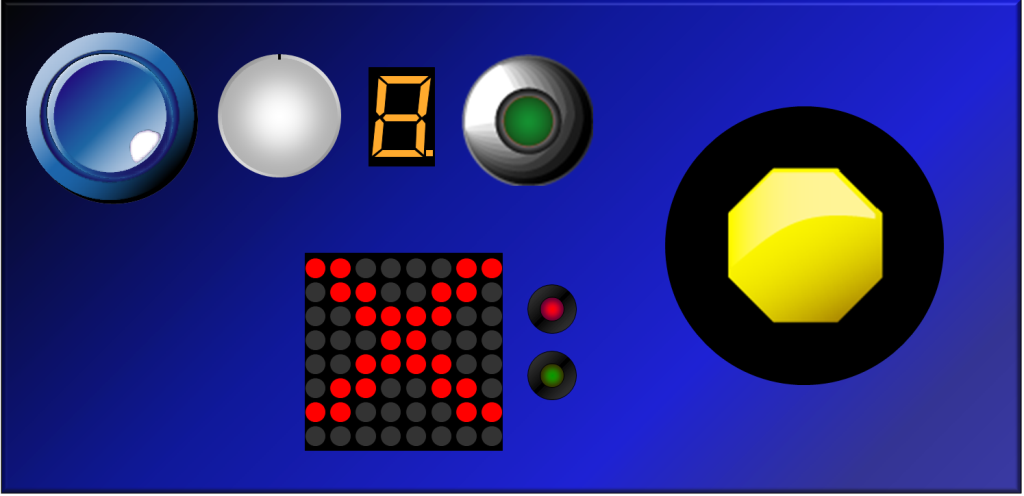
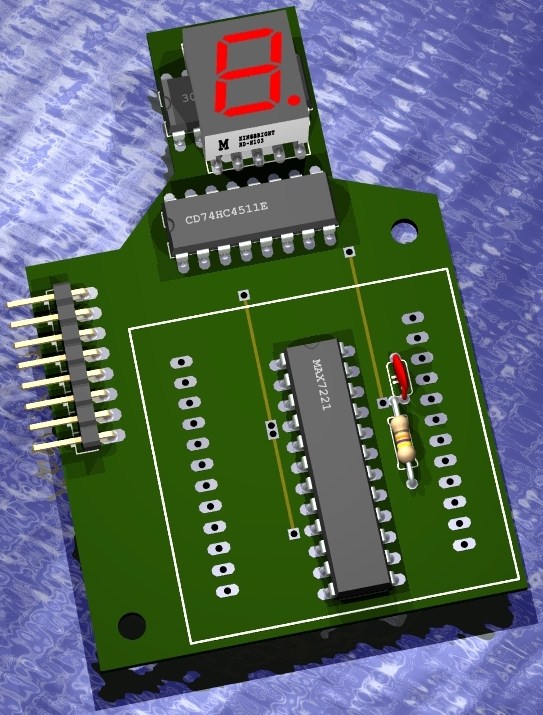
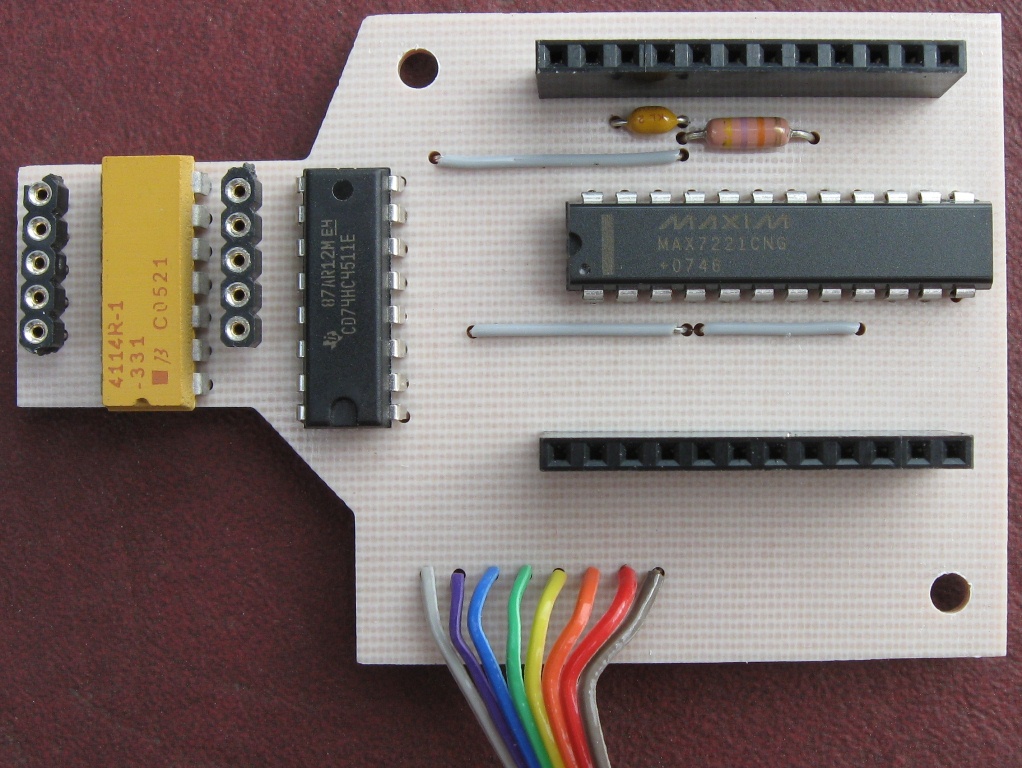
I designed a daughter board to house a 7 segment LED and an 8×8 LED matrix. I could have used a backlit 16×2 LCD display or a Nokia LCD, but I mainly use the router outside and I wanted displays that would be easy to read in bright sunlight. To control the matrix I am using a MAX7221. This kind of goes against my philosophy of ‘why use hardware when you can do it in software,’ but Maxim sent me some free samples and it saves µC pins and programming time. Along those same lines, I’m using a CD74HC4511 to control the 7 segment. I’m only using 6 AVR pins to control both displays.

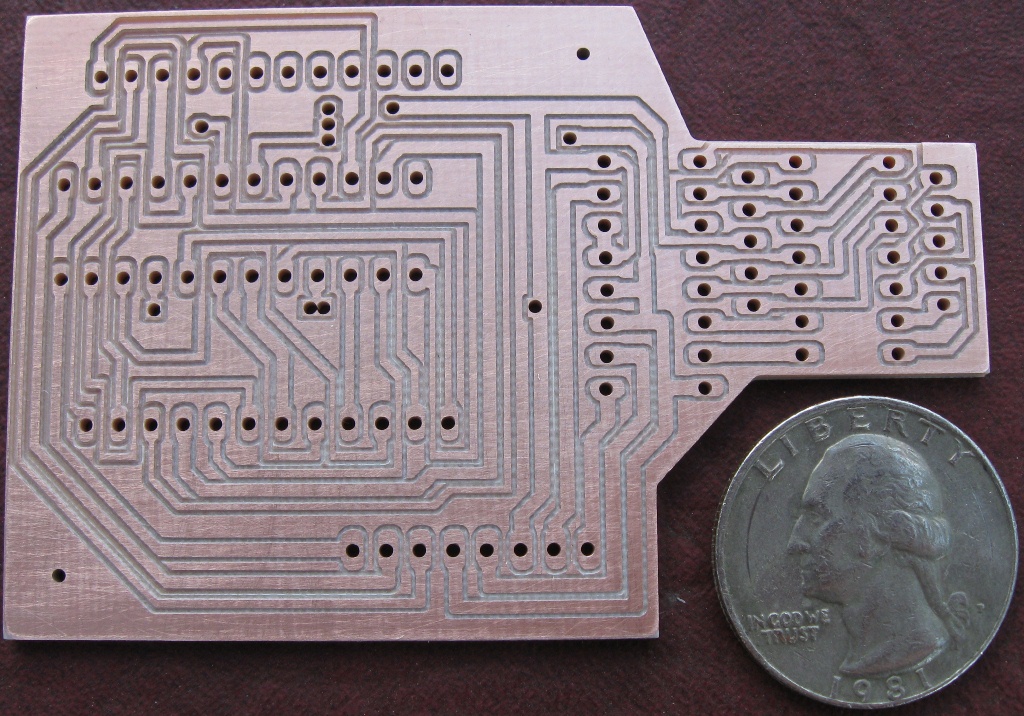
I was much more ambitious when designing the display board in terms of trace width and routing. I have several 6 mil traces routed between IC pins. With these smaller traces, the depth errors become more pronounced. Still there is only 1 failed traced that I easily jumpered. The unusual shape of the board is to accommodate the controls placed in close proximity. Cutting out the PCB board was made easy using a 0.0625″ diameter 1/8″ shank chip-breaker bit. I also used the same g-code to cut out a Lexan lens for the displays.
I was much more ambitious when designing the display board in terms of trace width and routing. I have several 6 mil traces routed between IC pins. With these smaller traces, the depth errors become more pronounced. Still there is only 1 failed traced that I easily jumpered. The unusual shape of the board is to accommodate the controls placed in close proximity. Cutting out the PCB board was made easy using a 0.0625″ diameter 1/8″ shank chip-breaker bit. I also used the same g-code to cut out a Lexan lens for the displays.
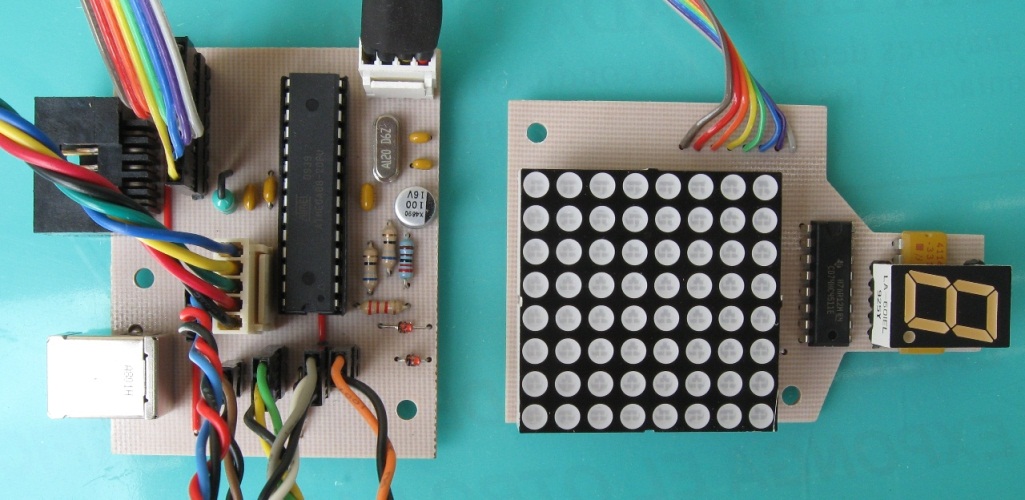
Here are the wired boards with the displays in their sockets.
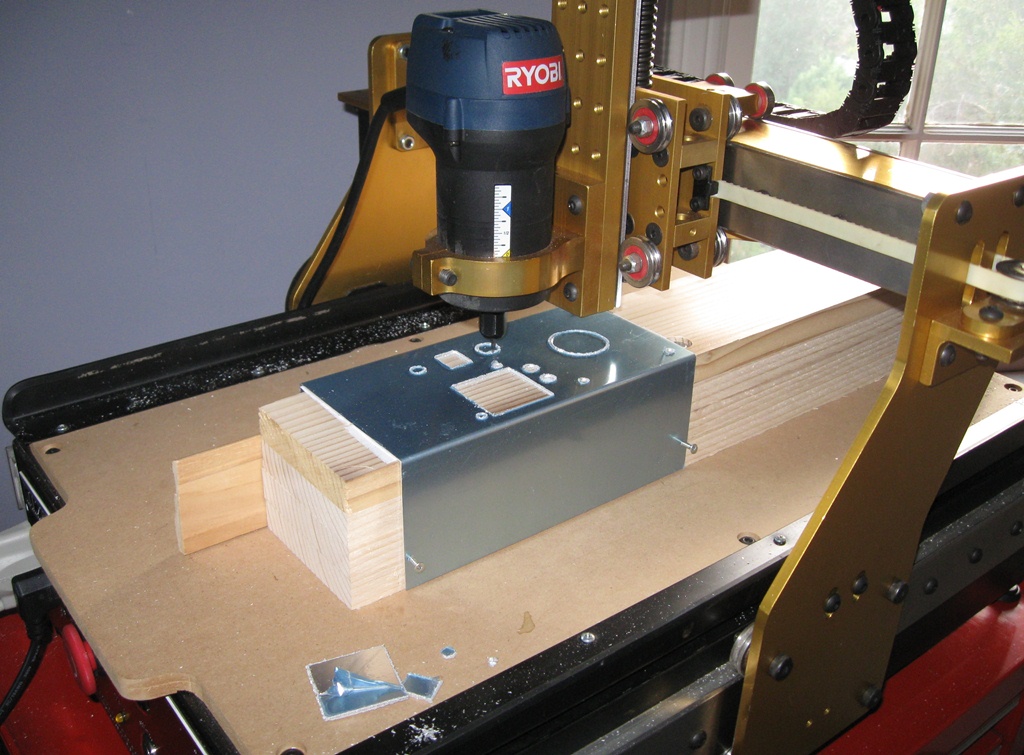
Here is the HS-1 cutting the holes for the top of the aluminum project box. I’m using a 30° engraving bit which is probably the wrong bit for this application but it works and gives the display holes a subtle bevel.
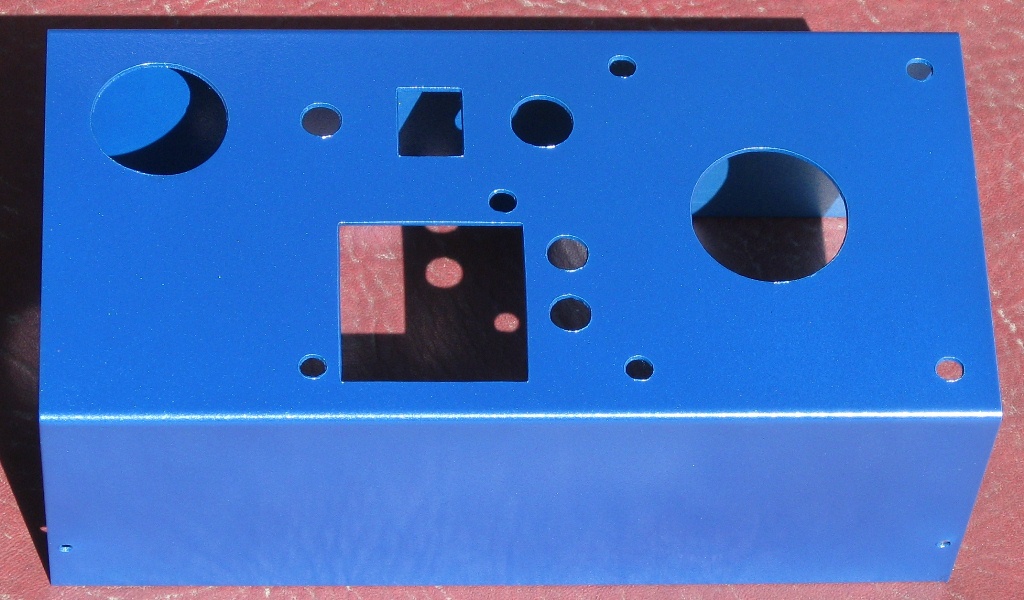
Here is the cut project box before and after a DIY toaster oven powder coating. The photo does not do justice to the Midnight Metallic Blue color. The blue is darker in person and the metallic finish looks great.

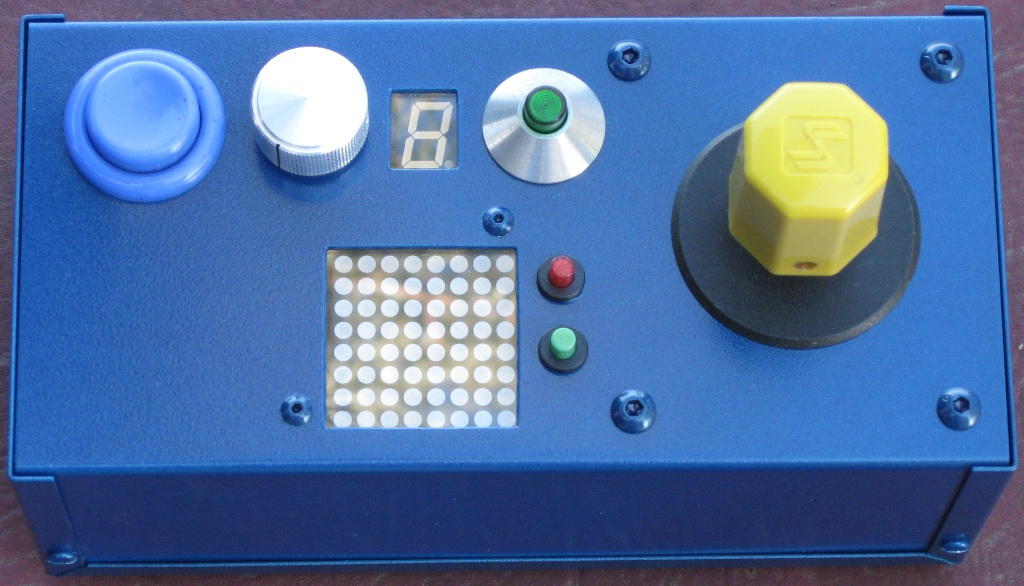
Here is the assembled project. At 8″w x 4″d x 3″h, the box is compact and just big enough to fit the controls. I mounted the joystick and display board using button socket cap screws with a matching powder coat.
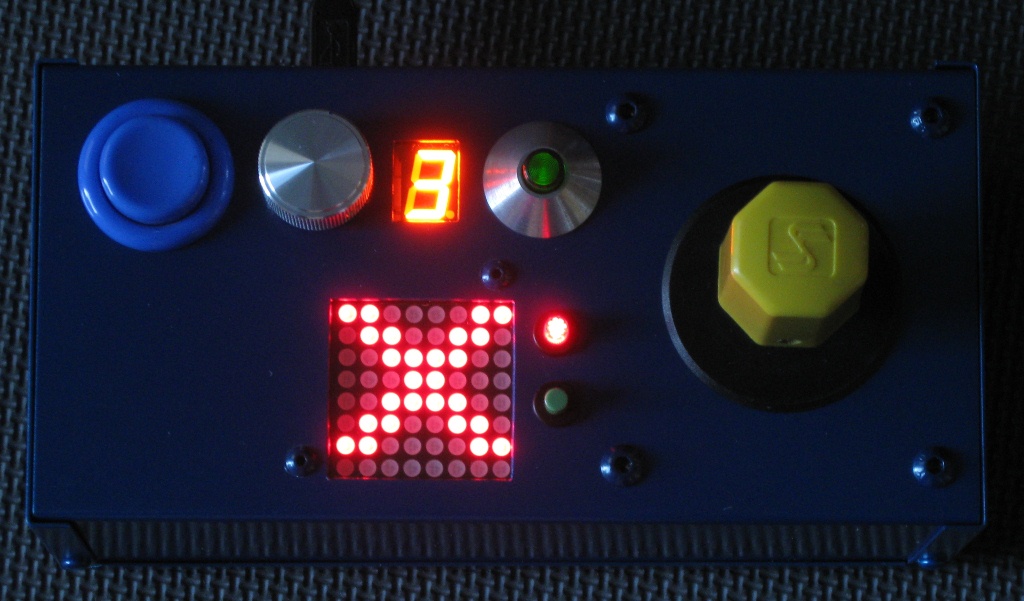
I really wanted to get a good picture of the joystick all lit up, but it’s tough taking pictures of illuminated LED’s and my camera and photography skills are not very good.
The CNC joystick appears to the computer as a regular PC USB joystick. I use Key Grabber to inteface with Mach3 which controls the CNC router.
The AVR code was written using Bascom by MCS Electronics.
Downloads:
AVR hex code v.0.70
Bascom Basic source code 07/08/2010
ATMega88 12 MHz xtal, fuse bytes: Low = 0xEE, High = 0xDF, Extended = 0xF9 (CKSEL=1110 SUT=10)
Eagle files
Mach3 Key Grabber config file – 10/14/2010
VCarve Pro files for aluminum enclosure cut out file – 10/10/2010
Joystick Testing Utility v.3.0
Parts List:
| Description | Qty |
|---|---|
| Atmel ATMEGA88-20PU | 1 |
| Maxim Max7221 | 1 |
| BC-to-7 Segment CD74HC4511E | 1 |
| 12 MHz Crystal | 1 |
| 7 Segment Orange LED Display HD-H103 | 1 |
| 8x8 Red LED Matrix NFM-12881BG-11 | 1 |
| Resistor Carbon Film 68 Ohm 1/4 Watt 5% | 2 |
| Resistor Carbon Film 150 Ohm 1/4 Watt 5% | 1 |
| Resistor Carbon Film 2K2 Ohm 1/4 Watt 5% | 2 |
| Resistor Carbon Film 47K Ohm 1/4 Watt 5% | 1 |
| Resistor Array 300 Ohm x 7 | 1 |
| 3.6 Volt Low Power Zener Diode | 2 |
| 10μH Inductor | 1 |
| Ceramic Radial Capacitor 22pF 50V 10% | 2 |
| Ceramic Radial Capacitor .1uF 50V 10% | 2 |
| Ceramic Axial Capacitor .1uF 50V 10% | 2 |
| Polarized Radial Capacitor 100uF 16V 20% | 1 |
| 2 x 1 Pin Straight Header .100" | 2 |
| 3 x 1 Pin Straight Header .100" | 3 |
| 4 x 1 Pin Straight Header .100" | 1 |
| 5 x 1 Pin Straight Header .100" | 1 |
| 8 x 1 Pin Straight Header .100" | 1 |
| 8 x 1 Pin Right Angle Header .100" | 1 |
| 5 x 2 Pin Right Angle Shrouded Header .100" | 1 |
| 5 x 1 Socket Straight Header .100" | 2 |
| 12 x 1 Socket Straight Header .100" | 2 |
| USB Connector | 1 |
| 28 Pin Narrow IC Socket | 1 |
| Single-sided Copper Clad Board 1 oz. 2" x 3" | 1 |
| Single-sided Copper Clad Board 1 oz. 2" x 2-3/8" | 1 |