
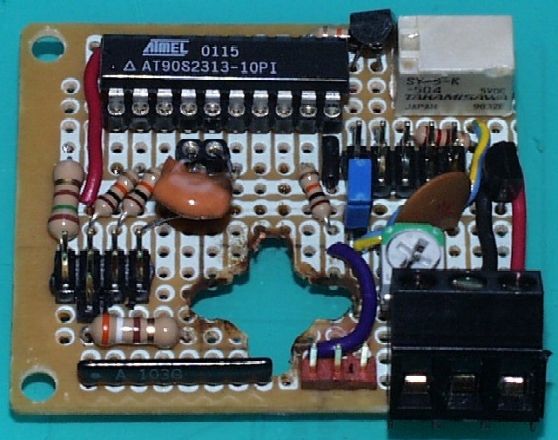
After reading 1UP’s account of using Dave Widel’s hack to have recoil in Terminator 2, I wanted a way to have recoil in other gun games. At this time, I believe MAME does not provide any support for recoil or force feedback. So I decided to build a circuit that would work with most gun games. Like all my other arcade circuits, the brain is an Atmel AVR microcontroller that is easily programmable via my USB AVR Programmer. In order to get the circuit to fit in my Operation Thunderbolt Uzi, I trimmed 3/4″ off a 2-7/8″ perf board and used a Dremel to drill a plus shaped hole. Here is a shot of my prototype circuit:
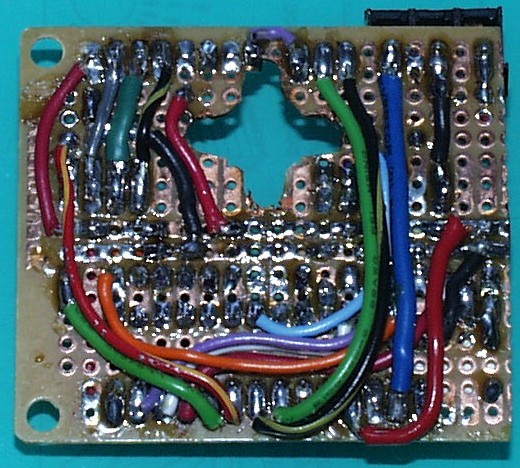
And the reverse side. Looking back this is so sloppy. I now create prototypes using etching or with my Romaxx CNC.
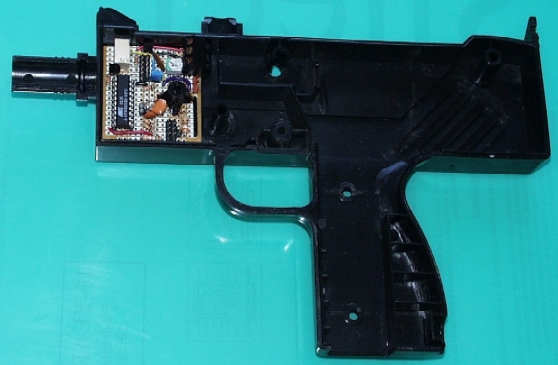
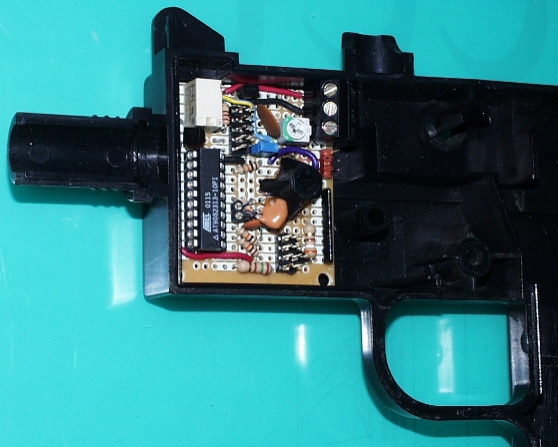
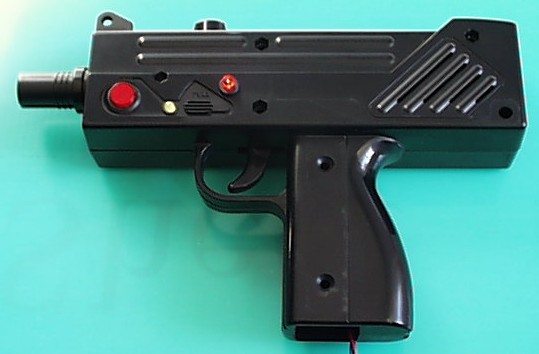
Mounted in the gun:
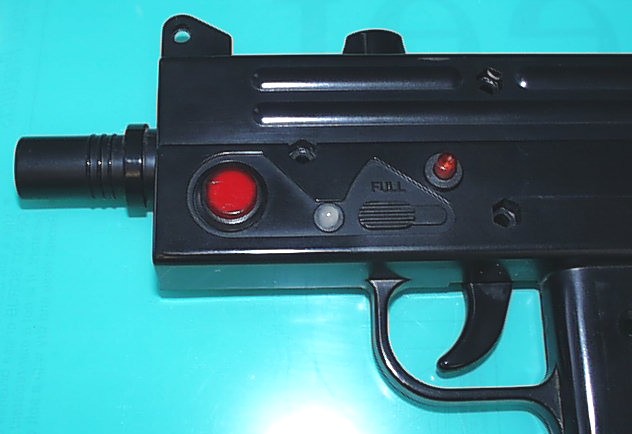
My first thought was just to make the recoil fire when the trigger is pulled. However, some games respond to the trigger pull with a single round while other games are continuous fire. Furthermore, games like Terminator 2 actually regulate the recoil based on fire rate and ammo. The OT gun has a fake switch for semi or fully automatic. I modified the gun with a real switch so I can now actually select between 3 modes: Semi-automatic, Fully-automatic and MAME controlled. Semi-automatic will recoil once with every trigger pull. This is great for games like Crossbow where you have to pull the trigger for each shot. Fully-automatic will recoil continuously at a force feedback rate which can be adjusted using the variable resistor on the circuit board. MAME controlled will cause the gun to recoil when the CAPS Lock is activated. Currently, this mode will only work with Terminator 2 using the Widel hack. Hopefully, in the future there will be more LED recoil hacks for other games. To switch between modes you just press the red illuminated miniature push button switch shown below above the trigger.
I mounted a bipolar LED on the gun between the new switch and the grenade launcher button to indicate mode and for eye candy. The LED is designed to produce red or green with only 2 pins depending on polarity. However, using pulse width modulation code I developed for my Rainbow Circuit, I added 3 lighting scenes for each firing mode. In semi-automatic the LED cycles through different shades of red. In fully-automatic the LED fades through greens and in the MAME controlled mode the LED morphs between red and green. Unfortunately, I couldn’t get a good pic of the LED illuminated.
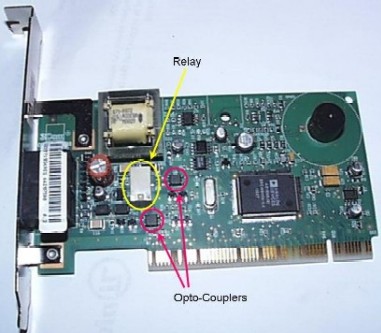
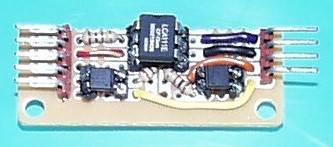
I believe the recoil solenoid in the OT gun is supposed to run at 24 volts pulling over 1 amp. This is more voltage and current than a keyboard encoder can supply, which necessitates another power source. My cab currently has a secondary 14 volt, 3 amp power supply for lighting. I decided to test the solenoid with the under-powered 14 volts and to my surprise it worked; albeit slightly anemic. The hardest part of this circuit is dealing with the two power supplies. Since, the encoder and the circuit don’t share a common ground; I needed a way for them to communicate. I also needed a way for my circuit’s 5 V low current microcontroller to drive the solenoid. I found the answer in an old 14.4 modem card that was in my junk bin. The modem has opto-couplers that use light to bridge the gap between separate circuits and it also has a solid-state relay that can handle 1 amp. The optos are a pain to work with because they are surface mount which requires very precise soldering. Below is a shot of the modem and my opto satellite circuit. I put the optos on the left over 3/4″ piece of perf board that I cut to build the main board. By moving the opto circuit out of the gun and into the cab, I reduce the number of wires I have to run to the gun. Also it would have been very difficult to try and fit everything in the gun.
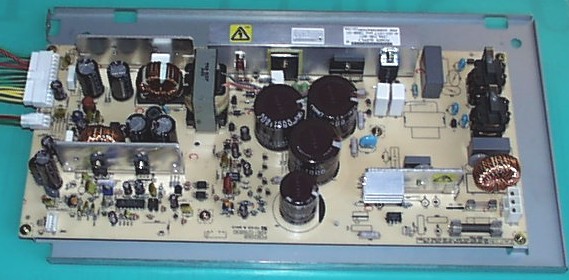
The solenoid pushes the relay slightly past its maximum ratings, but it works. If I didn’t already have it, I would have opted for a more powerful relay. Another issue is that the solenoid generates enough EMF to actually reset the microcontroller after several shots. I had to create a jumper to pull the controller’s reset pin high to prevent interference. This is probably a good idea for all AVR circuits and I might go back and add it to my recent projects. From the start of this project, I’ve encountered several mysterious bugs that I thought might be power supply related. The inductive load generated by the solenoid can really tax a p/s. I spent several days taking apart junk in search of a better solution. I tried a long dead inkjet printer, but the p/s was too weak. I opened up a broken 19″ CRT, but the p/s was too incorporated with the rest of the electronics. Still dead monitors are a great source for relays, transistors and opto-couplers. Finally, I found the perfect p/s. There was a big Lexmark laser printer at my office that was broken and the cost to repair it was more than it was worth. I should also add don’t ever buy a Lexmark laser printer, because they jam and the toner is over-priced. A real POS, but with a great p/s on its own board with high quality regulated output at 5 V and 24 V with enough current for a serious shock. All the glitches ended with the new p/s. Also the recoil is substantially stronger and more realistic with 24 V. Here is a shot of the new power supply. It is on the large size. I will have to build an enclosure that will be around 15″ x 8″ x 3″.
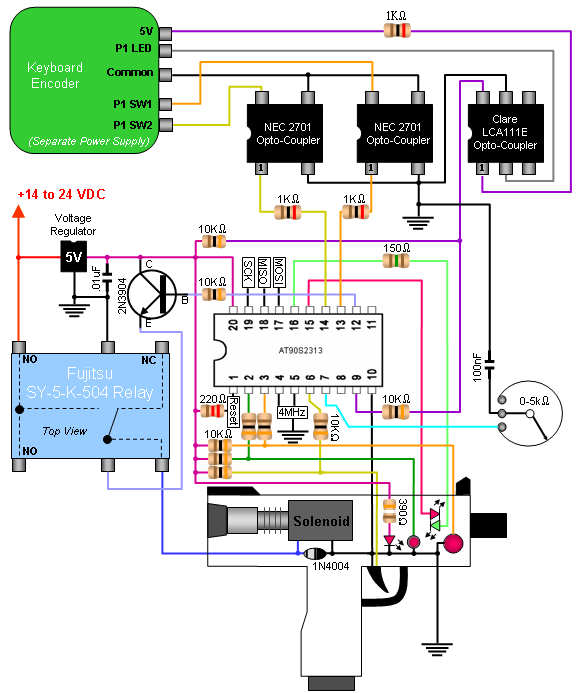
Here is a schematic:
Downloads:
Compiled AVR code
The only part I did not have lying around was the Bi-polar LED.
Parts list:
| Parts | Qty | Cost |
|---|---|---|
| Perf Board | 1 | $ 1.83 |
| Bi-Polar LED | 1 | 1.61 |
| Atmel AT90S2313-10PI AVR | 1 | 2.70 |
| Miniature Illuminated Switch | 1 | 1.50 |
| 3 Node Terminal Strip | 1 | 0.25 |
| High Reliability 25 Pin SIP Socket | 1 | 0.50 |
| 4 MHz 3 Pin Resonator | 1 | 1.00 |
| 10K Ohm Resistor | 5 | 0.25 |
| 10K Ohm Resistor 8 Pin Bussed | 1 | 0.25 |
| 150 Ohm Resistor | 1 | 0.05 |
| 220 Ohm Resistor | 1 | 0.05 |
| 390 Ohm Resistor | 1 | 0.05 |
| 1K Ohm Resistor | 3 | 0.15 |
| 0-5K Ohm Variable Resistor | 1 | 0.00 |
| 2N3904 Transistor | 1 | 0.15 |
| 5V Regulator | 1 | 0.40 |
| .01 μF Capacitor | 1 | 0.10 |
| 100 nF Capacitor | 1 | 0.10 |
| NEC 2701 Opto-Coupler | 2 | 0.00 |
| Clare LCA111E Opto-Coupler | 1 | 0.00 |
| Fujitsu SY-5-K-504 Relay | 1 | 0.00 |
| 1N4004 Diode | 1 | 0.00 |
| Total Cost for Recoil Circuit | $ 10.94 |