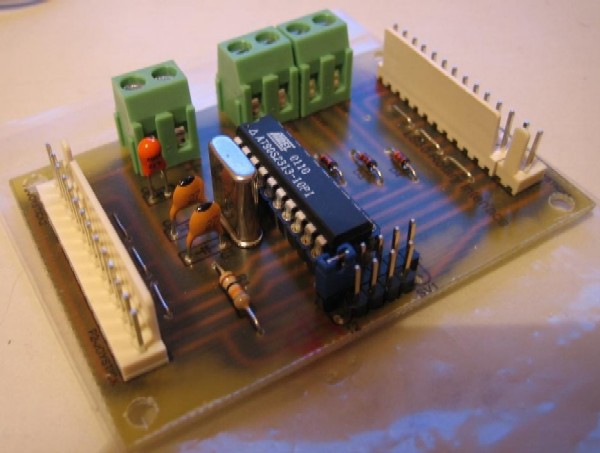
The PCB boards finally arrived from the manufacturer and they look good. Here is a picture of the first rotary interface produced:
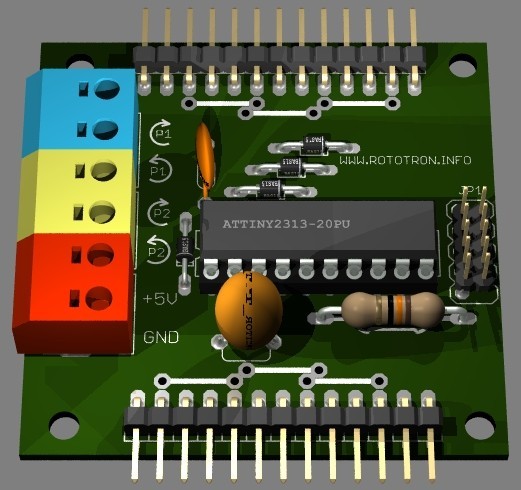
Below is the 3D model of my version 2 prototype created in POV-Ray using Eagle3D.
I decided to manufacture a limited batch because of numerous requests from BYOAC users.
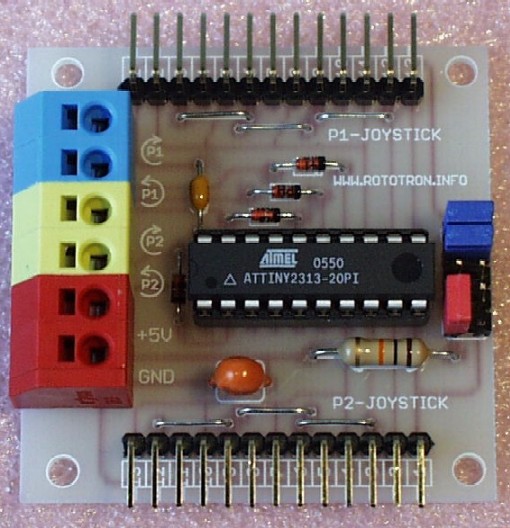
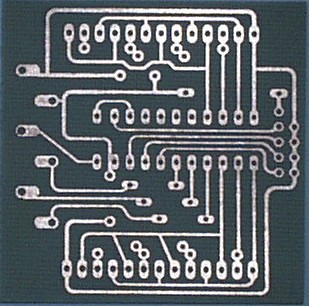
I’m now running an Atmel ATTiny processor with an internal oscillator running at 8 MHz. This is twice the speed of the predecessor. I’ve switched to a three color screw-less quick connect terminal. It works well with 22 AWG solid wire. Just press the wires in and they lock in place. The wires can be released with a paper clip. Wires can be inserted either on the top or from the side. The connector pins have been upgraded to gold for improved longevity. I’ve also added jumpers that allow the user to customize the key pulse duration. This substantially improves game play by allowing the user to tweak the responsiveness and accuracy. The overall size of the board has been reduced to a 2 inch footprint. Under the hood I’ve done extensive rewriting of the code. I’ve added a buffer to prevent the loss of clicks during quick twists. I’ve also improved the software multi-tasking to increase the 2-player efficiency. Here is a picture of the first version 2 prototype that I etched and silk-screened myself:
I designed the schematics and circuit board using the free version of CadSoft Eagle.
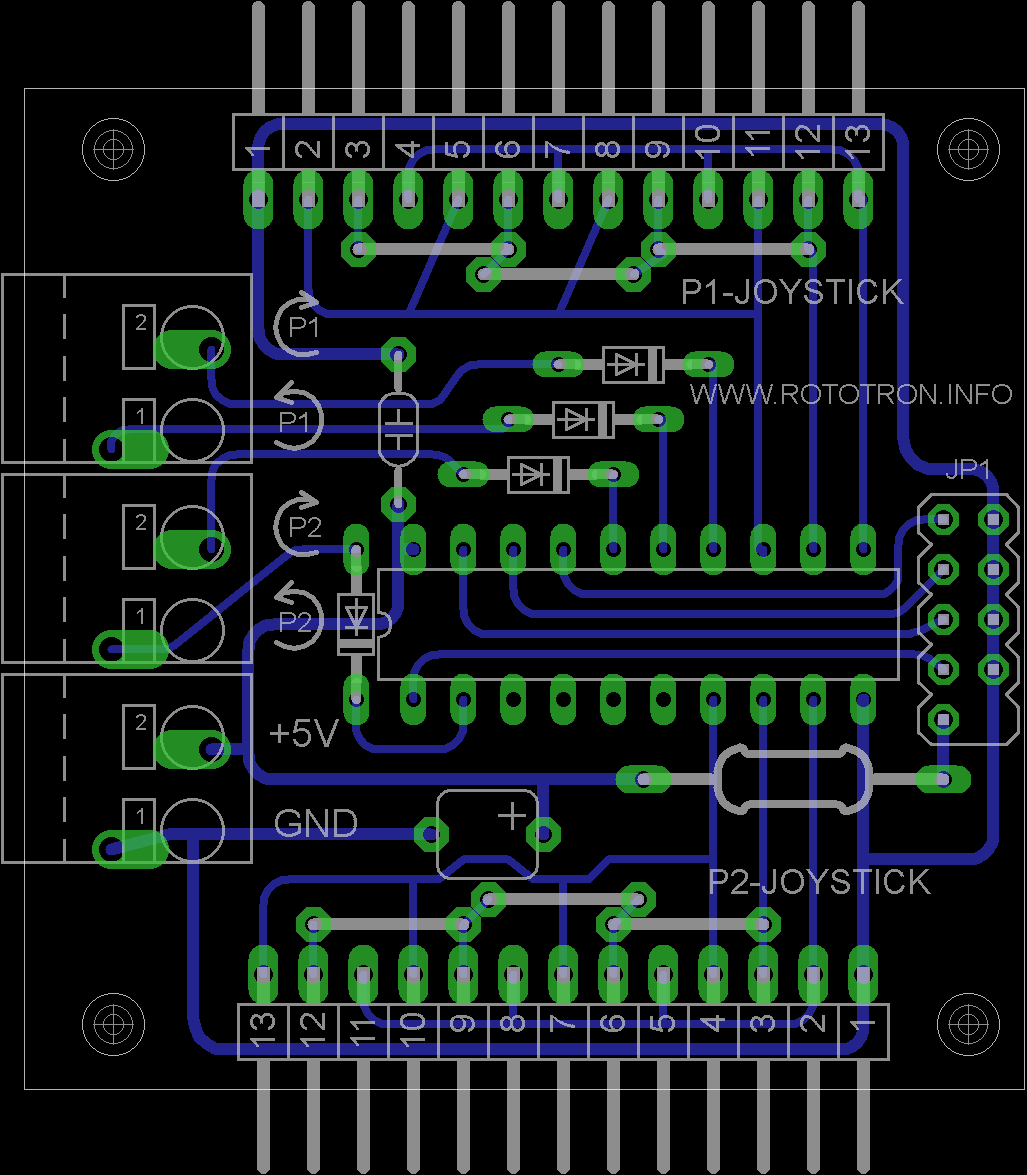
The program is not at all intuitive, but the lite version is free and more than adequate for my needs. I found this great website by Thomas P. Gootee that demonstrates how to etch circuit boards with inexpensive household chemicals and a laser printer. Here is the back of the interface. I’m getting better at the etching. Here are my etching notes.
Schematics:
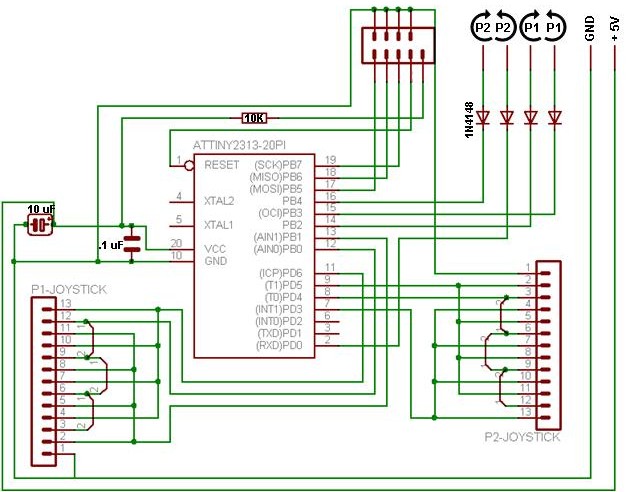
Parts List:
| Description | Qty |
|---|---|
| Atmel ATTINY2313-20PU | 1 |
| IC Socket 20 Pin | 1 |
| Resistor Carbon Film 10 KΩ 1/2 W 10% | 1 |
| Ceramic Axial Capacitor .1 μF 50 V 10% | 1 |
| Dipped Solid Aluminum Capacitor 10 μF 16 V 20% | 1 |
| 1N4148 High Speed Diode 100 V 200 mA DO-35 | 4 |
| 13 Pin Gold Right Angle Header .100" | 2 |
| 5 x 2 Pin Gold Straight Header .100" | 1 |
| Shunts .100" | 3 |
| Screwless 6 Position PCB Terminal Block | 1 |
| Single-sided Copper Clad Board 1 oz. 2" x 2" | 1 |
Rotary Interface Instructions
The last time I checked MAME had issues with rotary games. For improved game play I strongly recommend using MAME Analog+ version 83.2; otherwise you will probably experience missed clicks. I have had trouble with later versions so I still use version 8.32. When configuring the inputs, you ignore the dial settings and you use buttons 4 and 5 for P1 and P2 rotation.
The latest version of my software now addresses rotary switch debouncing issues that are more common among LS-30 joysticks that have seen heavy arcade time. The code works very well to compensate for joysticks that are past their prime. Still you have to be careful when buying used LS-30’s because many of the ones you find on eBay are worthless.
Downloads:
Hex Code
Version 0.6.10 – Released 05/10/2006 – For ATTINY2313 (Requires internal oscillator fuses set to 8 MHz with no divider)
Version 0.6.10 – Released 05/10/2006 – For AT90S2313 (Requires 8 MHz external crystal or resonator)
Eagle Files Version 5.0 CadSoft Schematics and Board files – Released 06/16/2008
Here is the pin out for the rotary interface harnesses. VGA cables work well for harnesses because they have 14 color coded wires:
| Color | Joystick | Interface |
|---|---|---|
| Brown | 01 | 13 |
| Red | 02 | 12 |
| Orange | 03 | 11 |
| Yellow | 04 | 10 |
| Green | 05 | 09 |
| Blue | 06 | 08 |
| Purple (Ground) | 07 | 01 |
| Gray | 08 | 07 |
| White | 09 | 06 |
| Black | 10 | 05 |
| White / Brown | 11 | 04 |
| White / Red | 12 | 03 |
| White / Orange | 13 | 02 |
Here is the pin out for the ISP programming header on the board. The red reset jumper must be removed for programming and replaced afterwards. The pin marked NC should not be connected to anything during prorgamming. The board must be connected to 5 V power during programming. The microcontroller can also be removed from the socket and programmed on a breadboard.

Here is a rotary interface that someone built themselves using my design and code. I have no intention of producing any additional boards so this is your best bet:
Xc@libur’s Rotary Interface