
After I posted my Raspberry Pi server room rack temperature monitor project, I received a request to make a tutorial on how to measure humidity in addition to temperature with a Raspberry Pi. The following video demonstrates 2 methods for controlling a DHT22 sensor:
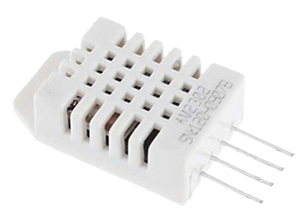
The 4 pin DHT22 sensor has 2.54 mm spacing so it works with a standard breadboard. It can operate at 3.3 V which makes it well suited for the Raspberry Pi.
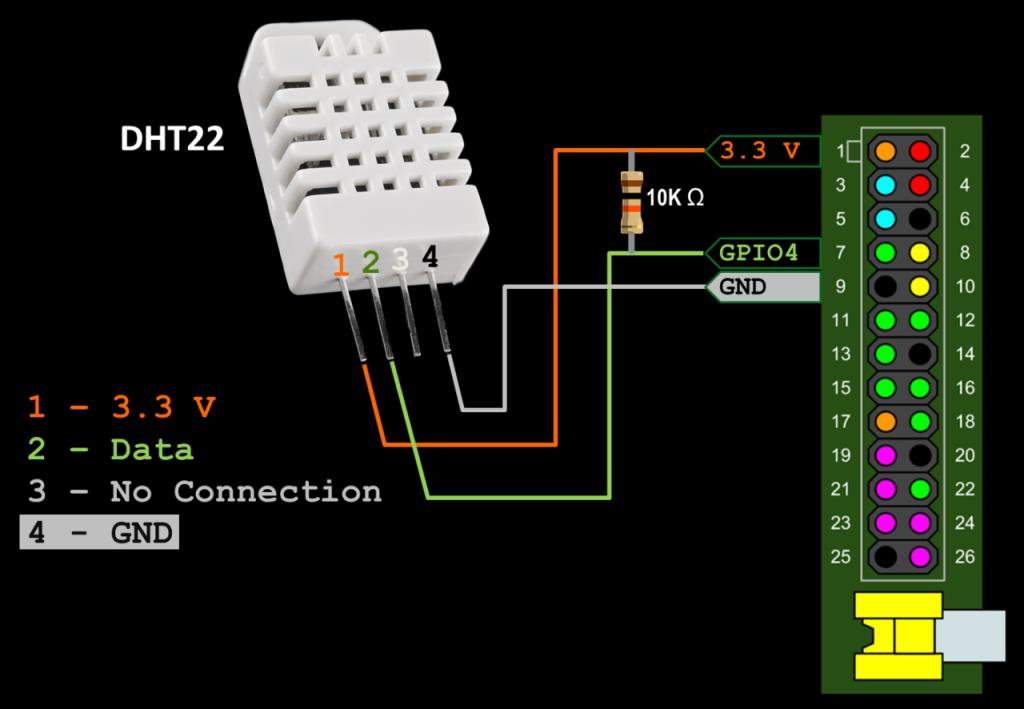
The wiring is very simple. Please make sure you add the 10 KΩ pull-up resistor between the 3.3 V and the data line.
The Adafruit Python DHT Sensor library makes interfacing the DHT22 easy. Please note that you should not use pip for installation because there are platform issues. Use git clone to install it from your home directory in a terminal window as follows. You can target Python 3 instead of Python 2 by changing python in the last line to python3.
cd ~
git clone https://github.com/adafruit/Adafruit_Python_DHT.git
cd Adafruit_Python_DHT
sudo apt-get update
sudo apt-get install build-essential python-dev
sudo python setup.py install
 A reboot of the Pi is required for the Adafruit drivers to function properly.
sudo reboot
Access to the GPIO requires superuser privileges. (Update: super-user privileges are no longer required for GPIO access with the latest version of Raspbian.) The Idle IDE no longer comes with the latest version of Raspbian. It has been replaced by the Thonny Python IDE. On older systems use gksu to open Idle with the necessary permissions:
/usr/bin/gksu -u root idle
To poll the sensor in Python:
import Adafruit_DHT as dht
h,t = dht.read_retry(dht.DHT22, 4)
print ('Temp={0:0.1f}*C  Humidity={1:0.1f}%'.format(t, h))
An alternative DHT22 library is provided by pigpio.
 Please note that it is no longer necessary to install pigpio because it now comes included with the latest version of Raspbian.
But if you need to manually install it, you can use the following:
wget abyz.me.uk/rpi/pigpio/pigpio.zip
unzip pigpio.zip
cd PIGPIO
make
sudo make install
The DHT22.py library will need to be placed in the same folder as your program. Please make sure you unzip the file. It can be downloaded from the examples page or you can use wget.
wget abyz.me.uk/rpi/pigpio/code/DHT22_py.zip
Before using pigpio, you must start the daemon:
sudo pigpiod
One advantage of this library is that once the daemon is started, you do not need special permissions in Python to poll the sensor. Make sure you unzip the pigpio DHT22 module to the same folder as your program. I noticed that on newer and faster Pi’s it is necessary to add a sleep delay of 10 ms to allow the trigger command to complete.
import pigpio
from time import sleep
# this connects to the pigpio daemon which must be started first
pi = pigpio.pi()
# Pigpio DHT22 module should be in same folder as your program
import DHT22
s = DHT22.sensor(pi, 4)
s.trigger()
sleep(.03) # Necessary on faster Raspberry Pi's
print('{:3.2f}'.format(s.humidity() / 1.))
print('{:3.2f}'.format(s.temperature() / 1.))
s.cancel()
pi.stop()
The pigpio DHT22 module also supports an LED indicator which can be wired to any GPIO pin in series with the appropriate resistor:
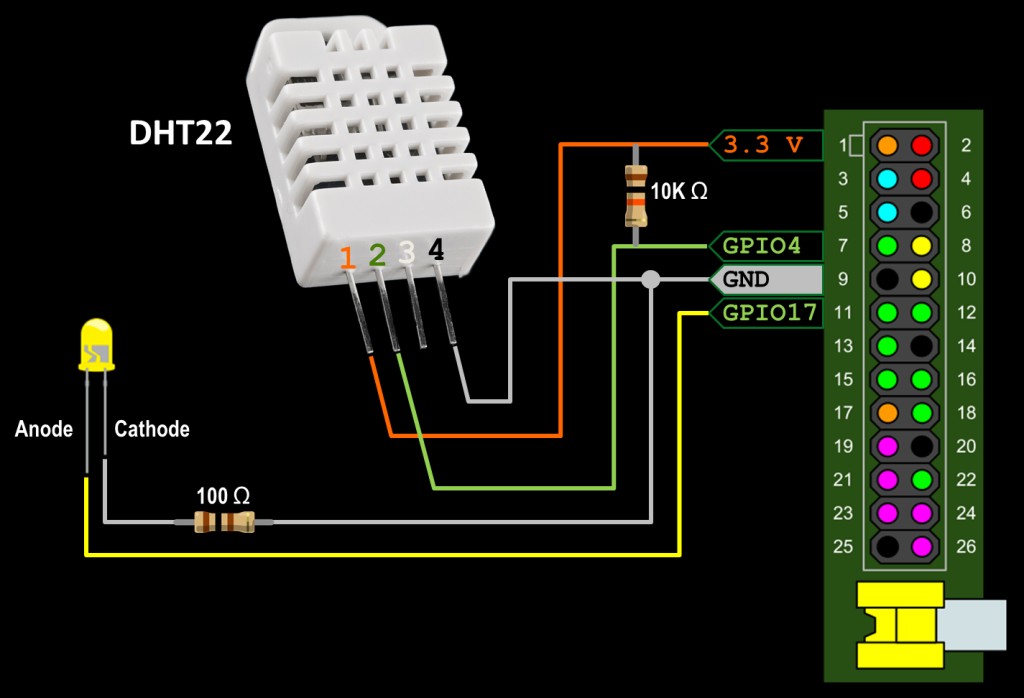
One optional parameter is added to the sensor method to specify the GPIO pin of the LED:
# last parameter is LED GPIO pin
s = DHT22.sensor(pi, 4, 17)
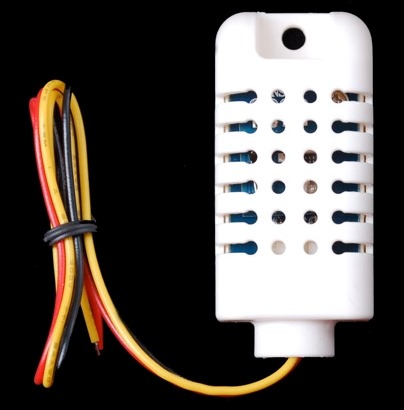
The DHT22 also comes in a wired module branded as AM2302.
LCD Display Example:
Here’s a sample python program to display temperature and humidity on an LCD display using the Adafruit Python DHT Sensor library and the Adafruit Character LCD library.
from time import sleep
import Adafruit_DHT as dht
from Adafruit_CharLCD import Adafruit_CharLCD
lcd = Adafruit_CharLCD(rs=25, en=24, d4=23, d5=18,d6=15,d7=14,
                       cols=16, lines=2)

while 1:
    h,t = dht.read_retry(dht.DHT22, 4)  # Poll DHT-22
    lcd.clear()
    # Confirm valid temp and humidity
    if isinstance(h, float) and isinstance(t, float):
        t = t * 9/5.0 + 32  # Convert to Fahrenheit
        lcd.message('    Temp: {0:0.1f}'.format(t))
        lcd.write8(223, True)  # Display degree symbol
        lcd.message('F\nHumidity: {0:0.1f}%'.format(h))
    else:
        lcd.message('Error...')
    sleep(4)
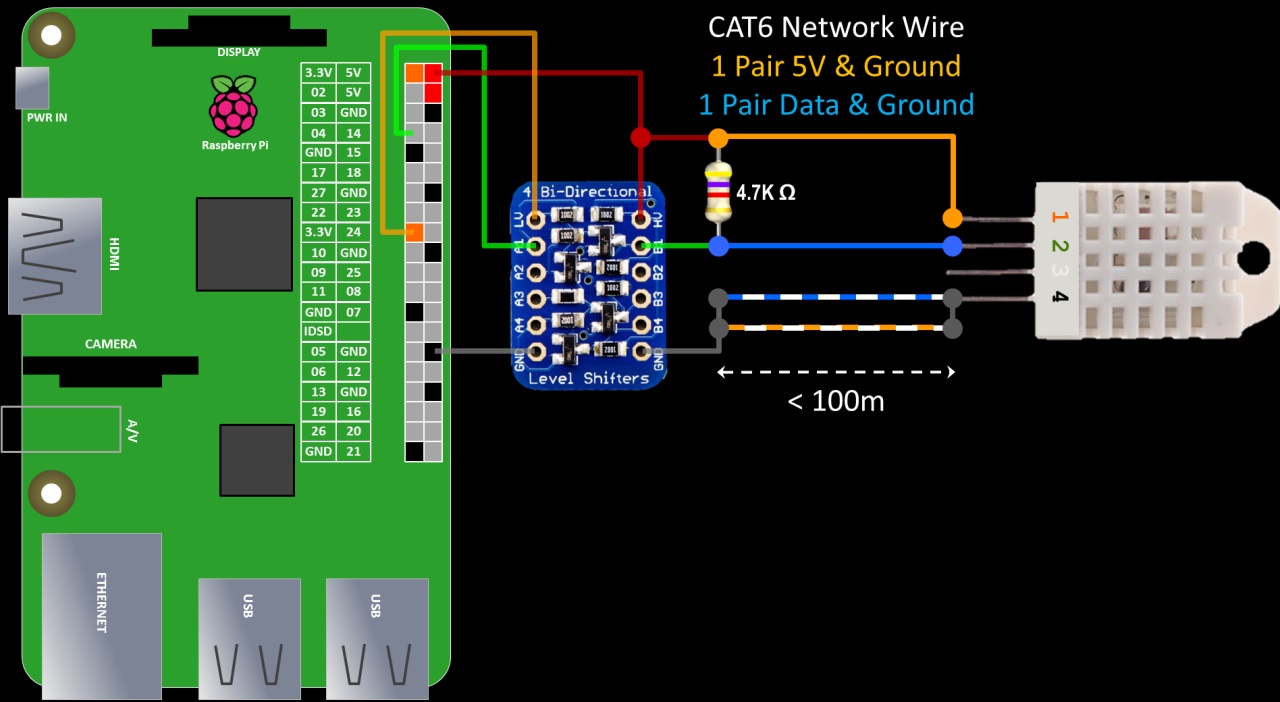
I received a question about maximum wire length between the Pi and the DHT22 sensor. The datasheet states the maximum wire length is 100 meters. I think this is very optimistic. Distances greater than 100 cm requires 5 V, so it is necessary to use a level shifter on the data line to lower the 5 V down to a Pi friendly 3.3 V. I recommend using a level shifter with a FET design such as the Adafruit 4 channel BSS138. I found the TXB104 shifters unreliable with the DHT22. I performed a test at 20 meters distance and got reliable results using CAT6E 550 MHz 23 AWG network cable (1 pair for 5 V and ground and another pair for data and ground.) I also lowered the resistor value down to 4.7 KΩ. Here’s a schematic:
Please note that the DHT22 sensor requires a minimum of 2 seconds between calls. If you try to poll it more frequently, you may experience errors.
 Please note this is an old tutorial and there are many more sensors available. I really like the Adafruit Si7021 which is reliable and easy to connect because of it I2C protocol.
