
This tutorial demonstrates hosting a WebSocket server on an ESP32 running the LoBo MicroPython firmware. WebSocket protocol enables real-time two-way data transfer between a server and a client such as a web browser in a very efficient and standardized manner. The WebSocket server will broadcast temperature data from a DS18b20 sensor connected to an ESP32. A web page built with React and MobX State Tree on a Raspberry Pi will be the client.
This is the sixth video in my MicroPython ESP32 series.
- Part 1 demonstrates loading the ESP32 firmware, file manipulation with Rshell and NeoPixel LED’s.
- Part 2 uses MQTT to wirelessly transmit data from temperature/humidity sensors.
- Part 3 sets up a web server on the ESP32 that provides lighting control and sensor feedback.
- Part 4 demonstrates how to connect a color OLED display in addition to ADC and FTP.
- Part 5 demos the ESP32’s built-in capacitive touch sensors.
 Unfortunately, it looks like LoBo MicroPython has been abandoned by the author. I recommend using regular MicroPython. Help is available on the MicroPython forum. The MicroWebSrv library used in this video also works on the regular version.
WebSockets are a great way to provide fast full-duplex communication over the Internet. They are commonly used to create chat applications. When combined with hardware like the ESP32 they offer the ability to display sensor data and control devices such as LED’s, displays, motors, relays, etc. over the Internet. For example, here’s an ESP32 WebSocket server transmitting capacitive liquid level readings to a React client on a tablet.
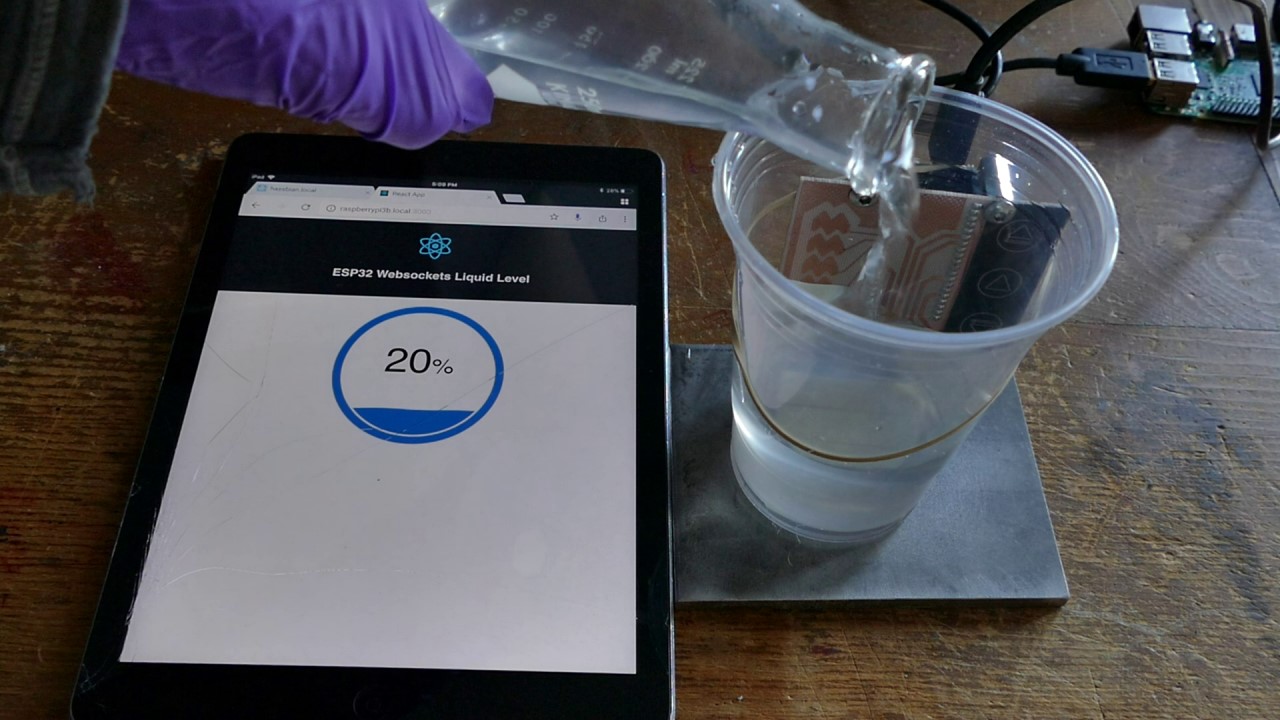
React is a powerful and relatively easy solution for interactive Web or mobile UI’s. There are tons of open source React components available for download on the web such as this fluid level gauge which really expedites coding. NPMJS.com provides a large registry of open source reusable JavaScript and React components.
For this tutorial I’ll be using the LoBo MicroPython firmware which has many advantages over the standard MicroPython.org build used in my previous tutorials.
- LoBo has support for up to 16MB of PSRAM. This addresses a common problem which is the limited amount of free memory available when using MicroPython on an ESP32.
- The LoBo firmware is built as an ESP-IDF component. This means the regular ESP-IDF menu config system can be used for configuration.
- There is SD card support which greatly increases storage capability.
- The LoBo firmware comes with many built-in modules implemented in C which improves performance and saves memory. Such as an FTP server, Telnet server, MQTT client, mDNS and GSM.
- Additionally there is SSH, Curl, a real-time clock with NTP synchronization, threading, a performant TFT display module and much more.
- I believe all the code in the LoBo library is either MIT or Apache licensing.
- Loboris, the creator of the project, has a forum and provides fantastic technical support and is very quick to address issues and implement new features.
- The LoBo build comes with Jean-Christophe’s MicroWebSrv library which includes WebSocket support. The author has made additional info available here.
- There is a flash.sh script to automatically install the firmware on the ESP32
Like the standard library, LoBo provides pre-built firmware which makes installation easy. There are several available firmware from bare bones to fully loaded with features such as SPIRAM, OTA, dual partitions and additional modules. If you have PSRAM, click MicroPython_LoBO_ESP32_PsRAM_All to download the full featured build. If you don’t have PSRAM then choose one of the other non-PSRAM versions. To install the firmware, run the flash.sh script and specify the ESP32’s USB port. Please make sure ESPTool is installed which is demonstrated in my first ESP32 MicroPython tutorial.
./flash.sh ttyUSB0
 fyi: To switch back to the MicroPython.org build, you must erase the flash first using ESPTool.
Here’s main.py which automatically runs when the ESP32 boots. It connects to Wi-Fi then starts the mDNS, FTP and Telnet services.
from network import mDNS, ftp, telnet, STA_IF, WLAN
from machine import idle
mdns = mDNS()
wlan = WLAN(STA_IF)
wlan.active(True)
nets = wlan.scan()
for net in nets:
    ssid = net[0]
    if ssid == b'YOUR_SSID':
        wlan.connect(ssid, 'YOUR_PASSWORD')
        while not wlan.isconnected():
            idle() # save power while waiting
        print('WLAN connection succeeded!')
        mdns.start('mPy', 'MicroPython ESP32')
        ftp.start(user='YOUR_USERNAME', password='YOUR_PASSWORD')
        telnet.start(user='YOUR_USERNAME', password='YOUR_PASSWORD')
        break
The main.py file can be copied to the ESP32 using Rshell over the USB connection. You can alternatively use Adafruit’s Ampy utility.
cp main.py /pyboard/flash
Please note the LoBo build expects the files to be in the sub-directory flash as opposed to the root. After the main.py file is copied and a reboot, the ESP32 can be managed wirelessly using Telnet and FTP. The LoBo firmware provides upysh which is a minimalistic MicroPython shell library to run file commands from the REPL. It can be loaded using:
from upysh import *
The upysh library provides the following helpful commands: pwd, cd, ls, head, cat, newfile, mv, rm, mkdir, rmdir, cp and clear.
With mDNS runnging, the ESP32 can now be referenced by the provided mDNS name instead of an IP. For the example above you could ping the ESP32 from another computer using mPy.local:
ping mPy.local -c 1
mDNS is built into Linux and Mac. It doesn’t come with Windows but can easily be added by installing a free program called Bonjour. If you have iTunes, it is probably already installed on your computer.
In the 3rd tutorial of this series I built a simple HTML web server on the ESP32 to provide temperature and humidity readings from a DHT22 sensor.
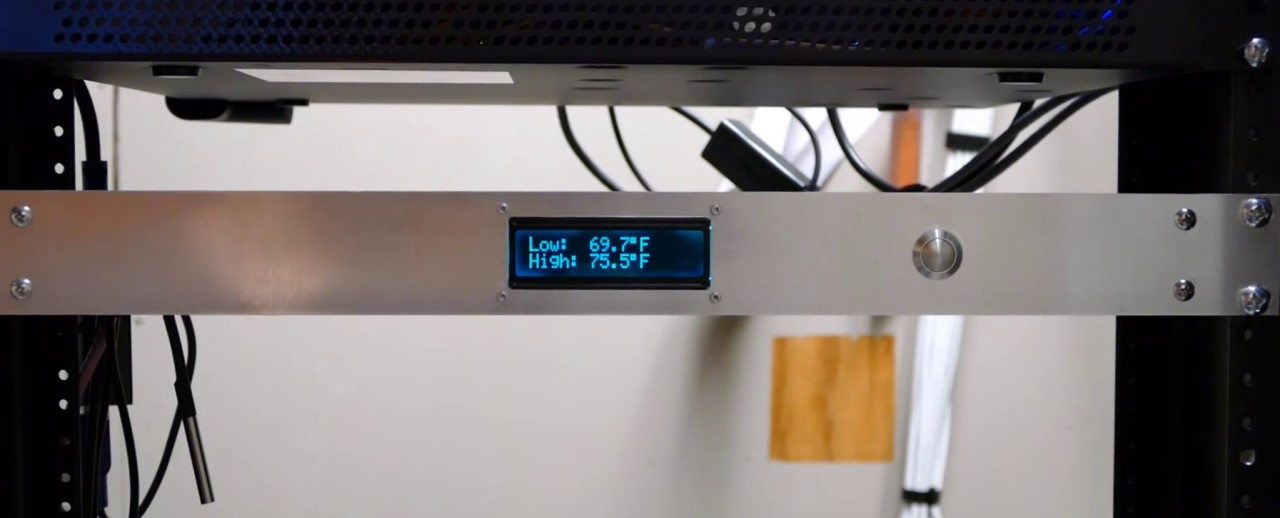
In this tutorial I will use a one-wire DS18b20 temperature sensor from my server room temperature monitor project which has been running flawlessly 24-7 for over 4 years now.
The DS18b20 digital thermometer provides 9-bit to 12-bit Celsius temperature measurements. It communicates over a 1-wire bus that only requires one data line. Another advantage of the DS18b20 is that multiple ones can be daisy-chained together on the same data line.
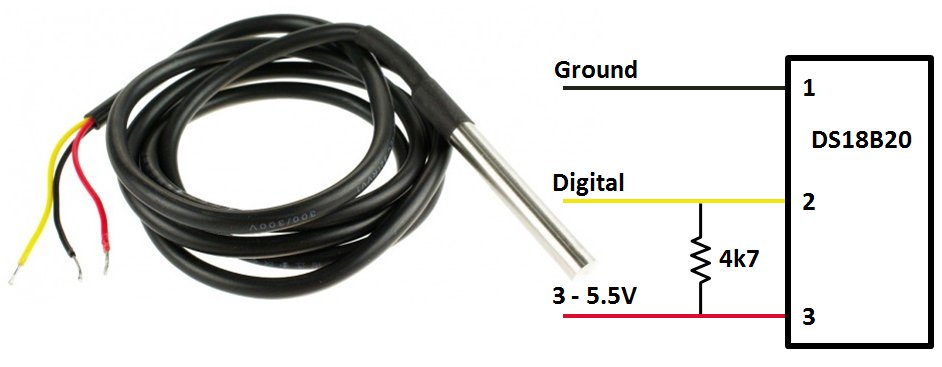
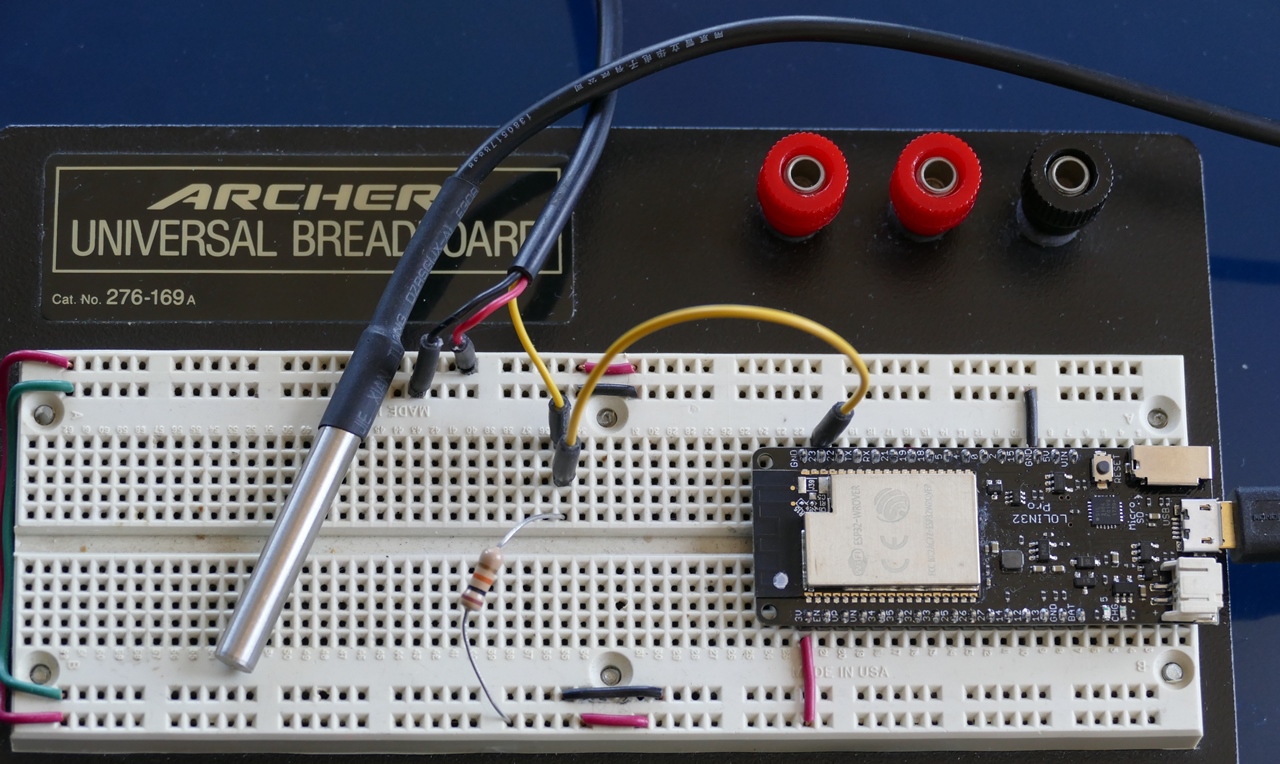
Wiring the DS18B20 to the ESP32 is easy. The red Vdd wire is connected to 3.3V on the ESP32. The black wire is connected to ground. The yellow data line is connected GPIO 23. A 10K pull up resistor is required between 3.3 volts and the data line.
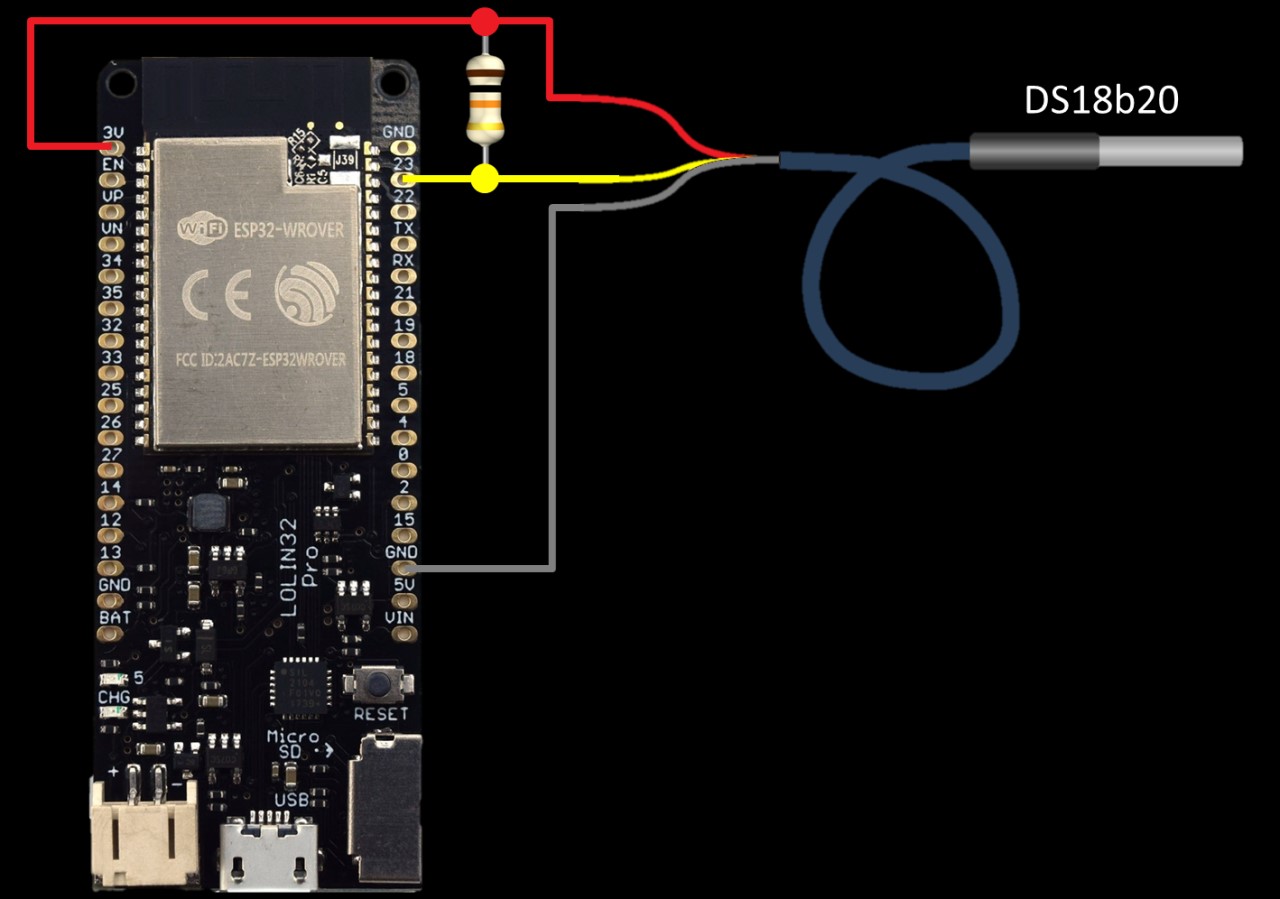
You can use any available GPIO pin under 34 for the data line. However, there could be a few exceptions because some boards reserve a few of the pins. For example, on the Wemos Lolin 32 Pro pins 2 and 22 don’t work.
The Lolin32 Pro works well with the LoBo firmware. It comes with 4MB of flash RAM and 4MB of PSRAM. There’s an SD card slot and a lithium battery interface with charging. Unfortunately, it looks like the board has been discontinued. However, the LoBo Wiki has a list of other suitable boards with PSRAM.
Here’s the MicroPython ESP32 WebSocket server code (ws1.py). It starts a WebSocket server and uses a hardware timer to poll the DS18b20 temperature sensor every 3 seconds and then transmit data along with the ESP32 internal temperature and time to any connected WebSocket clients.
import machine
from machine import Onewire, RTC, Timer
from microWebSrv import MicroWebSrv
import json
from time import sleep

ow = Onewire(23)  # Initialize onewire & DS18B20 temperature sensor
ds = Onewire.ds18x20(ow, 0)

rtc = RTC()  # Real-time clock
rtc.ntp_sync(server='us.pool.ntp.org', tz='PST8PDT')  # Pull time from Internet

tm = Timer(0)  # Instatiate hardware timer

def cb_receive_text(webSocket, msg) :
    print("WS RECV TEXT : %s" % msg)
    webSocket.SendText("Reply for %s" % msg)

def cb_receive_binary(webSocket, data) :
    print("WS RECV DATA : %s" % data)

def cb_closed(webSocket) :
    tm.deinit()  # Dispose of timer
    print("WS CLOSED")

def cb_timer(timer, websocket):
    dict = {}  # Store data in dict
    dict['temp'] = ds.convert_read()  # Poll temperature sensor
    print(dict['temp'])
    dict['internal'] = machine.internal_temp()[1]  # Read ESP32 internal temp
    dict['time'] = rtc.now()  # Record current time
    websocket.SendText(json.dumps(dict))  # Convert data to JSON and send

def cb_accept_ws(webSocket, httpClient) :
    print("WS ACCEPT")
    webSocket.RecvTextCallback   = cb_receive_text
    webSocket.RecvBinaryCallback = cb_receive_binary
    webSocket.ClosedCallback 	 = cb_closed
    cb = lambda timer: cb_timer(timer, webSocket)  # Use lambda to inject websocket
    tm.init(period=3000, callback=cb)  # Init and start timer to poll temperature sensor

mws = MicroWebSrv()                 # TCP port 80 and files in /flash/www
mws.MaxWebSocketRecvLen     = 256   # Default is set to 1024
mws.WebSocketThreaded       = True  # WebSockets with new threads
mws.WebSocketStackSize      = 4096
mws.AcceptWebSocketCallback = cb_accept_ws # Function to receive WebSockets
mws.Start(threaded=False)  # Blocking call (CTRL-C to exit)

print('Cleaning up and exiting.')
mws.Stop()
tm.deinit()
rtc.clear()
ds.deinit()
ow.deinit()
After copying the above ws1.py file to the ESP32, it can be run using import WS1 and stopped with CTRL-C. The WebSocket server can be tested by using the Python websocket-client library. It can be installed using pip.
pip3 install websocket-client
Here’s the Python code to test the WebSocket server. Please note that recv() method returns the first queued message which is not necessarily the most recent.
from websocket import create_connection
ws = create_connection('ws://mPy.local')
result =  ws.recv()
print(result)
ws.send('Hello World')
ws.close()
Before creating a React app on the Raspberry Pi, it is currently necessary to upgrade the version of Node.js that ships with Raspbian. Start by removing the existing Node programs.
sudo apt-get remove nodered -y
sudo apt-get remove nodejs and nodejs-legacy -y
Next curl is used to download and run n-install which installs the Node.js version manager and updates Node.js and NPM to the latest versions.
curl -L https://git.io/n-install | bash
A reboot is required after upgrading Node. Afterwards, use curl to install a dependency manager called Yarn which facilitates creating React apps. Another reboot will be required after installing Yarn.
curl -o- -L https://yarnpkg.com/install.sh | bash
The easiest way to get started with React is by using yarn create react-app.
yarn create react-app YOUR-APP-NAME
The create react-app starter-kit, generates a React.js application and does not require any build configuration. There is no need to mess around with WebPack or Babel. Everything gets pre-configured for you and you can just start writing code. There is also a development server that automatically refreshes when the code is edited.
To download the React repo for this tutorial use git clone. Next change into the downloaded folder and use Yarn to install and start.
git clone https://github.com/rdagger/React-WebSocket-Client-DS18b20.git
cd React-WebSocket-Client-DS18b20
yarn install
yarn start
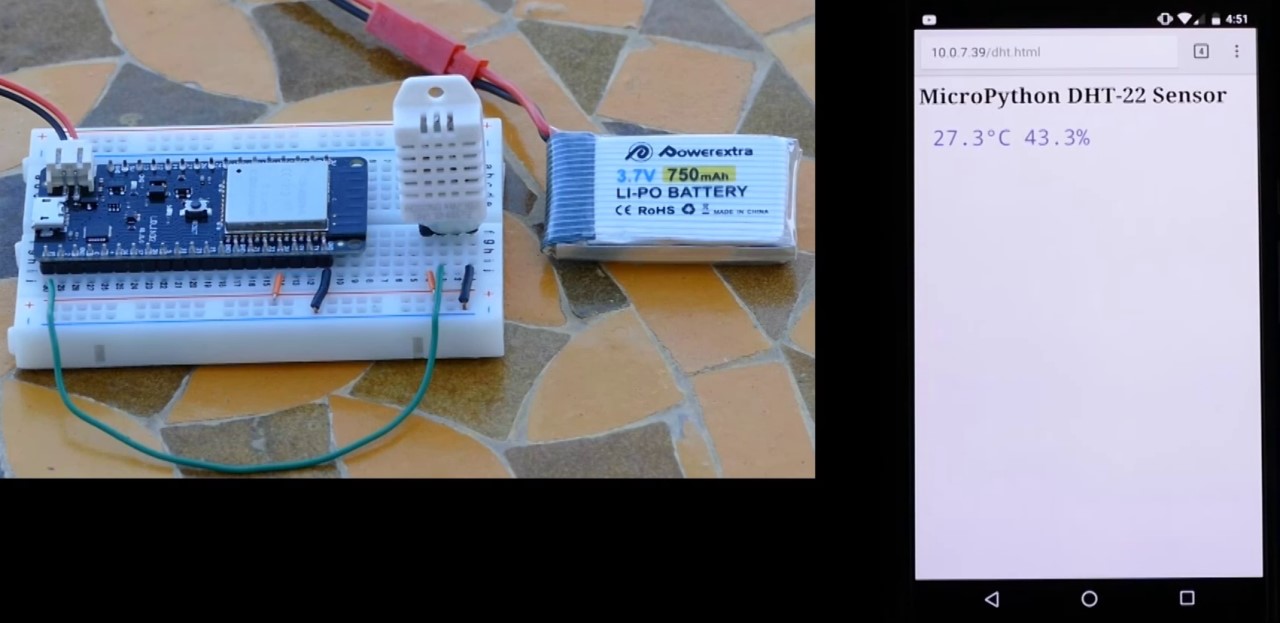
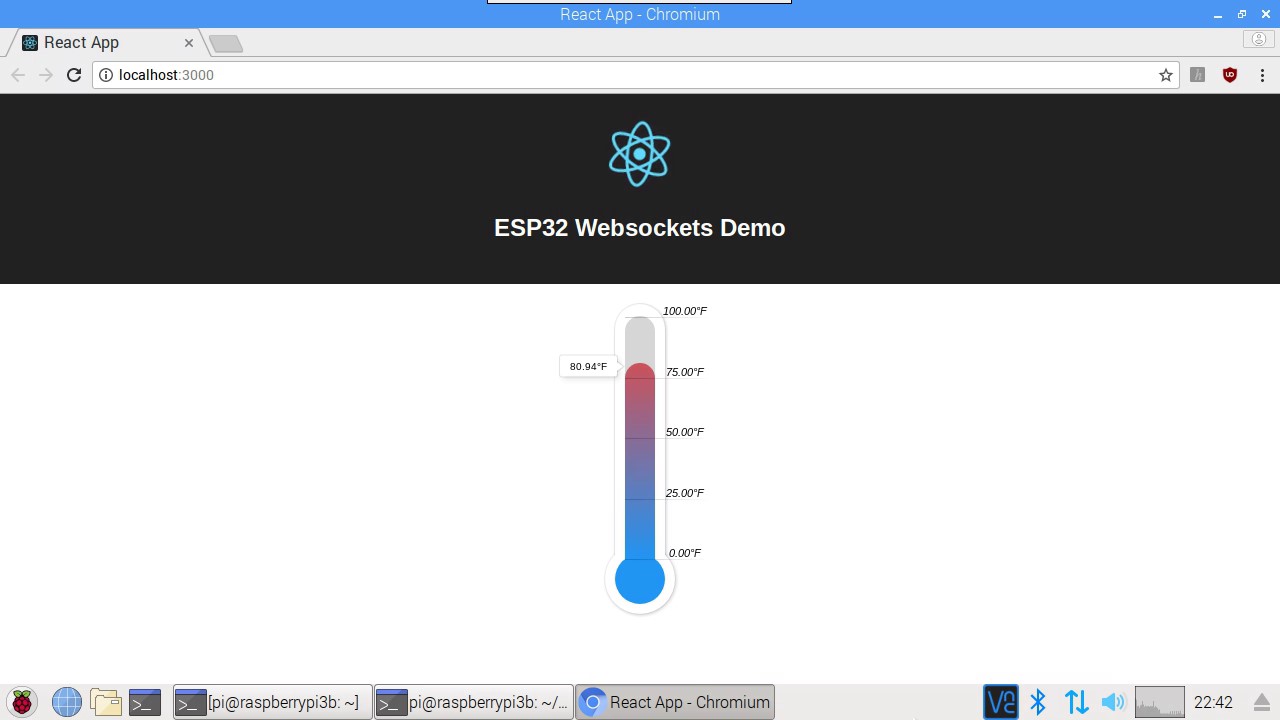
Here’s the React app displaying the temperature sensor data.
The LoBo build also has support for the DHT22 temperature/humidity sensor. Here’s sample code to poll the DHT22 sensor:
from machine import DHT, Pin
pin = 23
dht = DHT(Pin(pin), DHT.DHT2X)
result, temperature, humidity = dht.read()
if not result:
    print('Error!')
else:
    print('{0}°C {1}%'.format(temperature, humidity))
Resources for learning React, MobX and MobX State Tree:
ReactJS.org
Ten minute introduction to MobX and React
Manage Application State with Mobx-state-tree
Code:
My GitHub Repo.
React Liquid Gauge Component.
Water Level Sensor Code.